최근에 로직 수행에 걸린 시간에 관련해서 로그를 보고있었는데, 생각과 다르게 로그가 찍히고 있는걸 발견했다.
이상함을 느껴 조사해본 결과, @Transactional과의 실행 순서 문제로 인해 실제 데이터베이스 커밋 시간이 측정에서 제외되고 있었다는 것을 발견했다.이 글에서는 해당 문제의 원인과 해결 방법을 공유한다.문제 상황기존 AOP 성능 측정 코드java@Aspect
@Component
@Slf4j
public class PerformanceAspect {
@Around("@annotation(Monitored)")
public Object measureExecutionTime(ProceedingJoinPoint joinPoint) throws Throwable {
long startTime = System.currentTimeMillis();
try {
Object result = joinPoint.proceed();
return result;
} finally {
long endTime = System.currentTimeMillis();
long elapsedTime = endTime - startTime;
log.info("Method: {}, Elapsed Time: {}ms",
joinPoint.getSignature().getName(), elapsedTime);
}
}
}
서비스 메서드java@Service
public class UserService {
@Monitored
@Transactional
public void createUser(UserCreateRequest request) {
List<User> users = new ArrayList<>();
for (int i = 0; i < 10000; i++) {
users.add(new User("user" + i, "user" + i + "@example.com"));
}
userRepository.saveAll(users);
}
}
예상 vs 실제 측정 결과
HTTP response 시간은 5초 정도 소요되었다. 특별한 로직이 없기 때문에 DB 작업도 5초와 비슷하게 나와야 한다.
그런데 로그상에서는 0.5초로 기록되어 있다.
원인 분석Spring AOP 프록시 실행 순서@Order 어노테이션이나 명시적인 우선순위 설정이 없다면, 프록시 생성 순서에 따라 실행 순서가 결정된다.@Order 미설정 시 실제 동작:
@Transactional의 기본 Order: Ordered.LOWEST_PRECEDENCE (Integer.MAX_VALUE)
커스텀 AOP의 기본 Order: Ordered.LOWEST_PRECEDENCE (동일한 값)
같은 Order 값일 때는 프록시 생성 순서에 따라 실행 순서가 결정됨
문제가 된 실행 순서:
@Transactional (트랜잭션 시작)
@Around AOP (성능 측정 시작)
실제 메서드 실행
@Around AOP (성능 측정 종료) ← 여기서 측정 완료
@Transactional (트랜잭션 커밋) ← 이 시간이 누락됨
해결 방법@Order 어노테이션 활용@Transactional의 기본 Order 값은 Ordered.LOWEST_PRECEDENCE(최대값)로 설정되어 있다. 따라서 커스텀 AOP가 트랜잭션보다 먼저 시작하고 나중에 끝나도록 하려면 더 낮은 값을 설정해야 한다.java@Aspect
@Component
@Order(100) // 확실하게 order 를 설정
@Slf4j
public class PerformanceAspect {
@Around("@annotation(Monitored)")
public Object measureExecutionTime(ProceedingJoinPoint joinPoint) throws Throwable {
long startTime = System.currentTimeMillis();
try {
Object result = joinPoint.proceed();
return result;
} finally {
long endTime = System.currentTimeMillis();
long elapsedTime = endTime - startTime;
log.info("Method: {}, Elapsed Time: {}ms",
joinPoint.getSignature().getName(), elapsedTime);
}
}
}
실행 순서 변경 후:
검증 결과수정 후 측정 결과java@Aspect
@Component
@Order(100)
@Slf4j
public class PerformanceAspect {
// ... 성능 측정 로직
}
@Order(100) 설정으로 트랜잭션 커밋 시간까지 포함된 정확한 성능 측정이 가능해졌다.이제 HTTP response 시간과 유사한 측정값을 얻을 수 있어, 대용량 배치 처리 시 실제 소요 시간을 정확히 파악할 수 있게 되었다.결론AOP를 활용한 성능 측정 시 프록시 순서를 반드시 고려해야 한다.특히 대용량 데이터 처리나 배치 작업의 경우, 트랜잭션 커밋 시간이 전체 실행 시간에서 상당한 비중을 차지할 수 있다. 이 시간을 놓치면 실제 성능과 크게 다른 잘못된 측정값을 얻게 된다.html pre.shiki code .sVt8B, html code.shiki .sVt8B{--shiki-default:#24292E;--shiki-dark:#E1E4E8}html pre.shiki code .szBVR, html code.shiki .szBVR{--shiki-default:#D73A49;--shiki-dark:#F97583}html pre.shiki code .sScJk, html code.shiki .sScJk{--shiki-default:#6F42C1;--shiki-dark:#B392F0}html pre.shiki code .sZZnC, html code.shiki .sZZnC{--shiki-default:#032F62;--shiki-dark:#9ECBFF}html pre.shiki code .s4XuR, html code.shiki .s4XuR{--shiki-default:#E36209;--shiki-dark:#FFAB70}html .default .shiki span {color: var(--shiki-default);background: var(--shiki-default-bg);font-style: var(--shiki-default-font-style);font-weight: var(--shiki-default-font-weight);text-decoration: var(--shiki-default-text-decoration);}html .shiki span {color: var(--shiki-default);background: var(--shiki-default-bg);font-style: var(--shiki-default-font-style);font-weight: var(--shiki-default-font-weight);text-decoration: var(--shiki-default-text-decoration);}html .dark .shiki span {color: var(--shiki-dark);background: var(--shiki-dark-bg);font-style: var(--shiki-dark-font-style);font-weight: var(--shiki-dark-font-weight);text-decoration: var(--shiki-dark-text-decoration);}html.dark .shiki span {color: var(--shiki-dark);background: var(--shiki-dark-bg);font-style: var(--shiki-dark-font-style);font-weight: var(--shiki-dark-font-weight);text-decoration: var(--shiki-dark-text-decoration);}html pre.shiki code .sj4cs, html code.shiki .sj4cs{--shiki-default:#005CC5;--shiki-dark:#79B8FF}html pre.shiki code .sJ8bj, html code.shiki .sJ8bj{--shiki-default:#6A737D;--shiki-dark:#6A737D}
개발을 하다보면 타임아웃, 지연 시간, 캐시 만료 시간 등 다양한 시간 관련 설정을 다뤄야 할 때가 많다.기존에는 int나 long 타입으로 밀리초나 초 단위로 설정했지만, 이는 가독성과 유지보수성 측면에서 여러 문제점을 가지고 있었다.Spring Boot에서 제공하는 Duration 타입을 활용하면 이러한 문제를 깔끔하게 해결할 수 있다.기존 방식의 문제점단위가 불명확한 설정# 이 값이 초인지 밀리초인지 명확하지 않음
my-app:
request:
timeout: 5000
// 코드에서도 단위를 추측해야 함
@Value("${my-app.request.timeout}")
private long timeout; // 5000이 5초인지 5000초인지?
단위 변환의 번거로움// 설정값이 초 단위일 때 밀리초로 변환
long timeoutInMillis = timeoutInSeconds * 1000;
// 다양한 단위로 변환할 때마다 계산 필요
long timeoutInMinutes = timeoutInSeconds / 60;
Duration을 사용한 해결책명확한 단위 표기my-app:
request:
timeout: 10s # 10초
# timeout: 5000ms # 5000밀리초
# timeout: 2m # 2분
# timeout: 1h # 1시간
Duration은 다음과 같은 단위를 지원한다:
ns - 나노초
us - 마이크로초
ms - 밀리초
s - 초
m - 분
h - 시간
d - 일
Duration 사용의 장점가독성 향상: 설정값만 보고도 의미를 명확히 파악 가능유연성: 다양한 시간 단위를 자유롭게 사용타입 안전성: 컴파일 타임에 타입 체크편리한 변환: 다양한 단위로 쉽게 변환 가능Configuration Properties 구현package com.example.demo.config;
import java.time.Duration;
import org.springframework.boot.context.properties.ConfigurationProperties;
@ConfigurationProperties("my-app.request")
public record TimeoutConfiguration(
Duration timeout
) {
public TimeoutConfiguration {
if(timeout == null) {
timeout = Duration.ofSeconds(10);
}
if (timeout.isNegative()) {
throw new IllegalArgumentException("Timeout must be positive");
}
}
}
Service에서 활용하기package com.example.demo.service;
import com.example.demo.config.TimeoutConfiguration;
import java.time.Duration;
import lombok.RequiredArgsConstructor;
import lombok.extern.slf4j.Slf4j;
import org.springframework.stereotype.Service;
@Service
@RequiredArgsConstructor
@Slf4j
public class MyService {
private final TimeoutConfiguration timeoutConfiguration;
public void doSomething() {
Duration timeout = timeoutConfiguration.timeout();
log.info("Doing something with timeout. {}ms, {}s, {}h",
timeout.toMillis(),
timeout.getSeconds(),
timeout.toHours());
}
}
다양한 단위로 변환Duration 객체는 편리한 변환 메서드들을 제공한다:Duration timeout = Duration.ofSeconds(30);
long millis = timeout.toMillis(); // 30000
long seconds = timeout.getSeconds(); // 30
long minutes = timeout.toMinutes(); // 0
long hours = timeout.toHours(); // 0
html pre.shiki code .sJ8bj, html code.shiki .sJ8bj{--shiki-default:#6A737D;--shiki-dark:#6A737D}html pre.shiki code .s9eBZ, html code.shiki .s9eBZ{--shiki-default:#22863A;--shiki-dark:#85E89D}html pre.shiki code .sVt8B, html code.shiki .sVt8B{--shiki-default:#24292E;--shiki-dark:#E1E4E8}html pre.shiki code .sj4cs, html code.shiki .sj4cs{--shiki-default:#005CC5;--shiki-dark:#79B8FF}html .default .shiki span {color: var(--shiki-default);background: var(--shiki-default-bg);font-style: var(--shiki-default-font-style);font-weight: var(--shiki-default-font-weight);text-decoration: var(--shiki-default-text-decoration);}html .shiki span {color: var(--shiki-default);background: var(--shiki-default-bg);font-style: var(--shiki-default-font-style);font-weight: var(--shiki-default-font-weight);text-decoration: var(--shiki-default-text-decoration);}html .dark .shiki span {color: var(--shiki-dark);background: var(--shiki-dark-bg);font-style: var(--shiki-dark-font-style);font-weight: var(--shiki-dark-font-weight);text-decoration: var(--shiki-dark-text-decoration);}html.dark .shiki span {color: var(--shiki-dark);background: var(--shiki-dark-bg);font-style: var(--shiki-dark-font-style);font-weight: var(--shiki-dark-font-weight);text-decoration: var(--shiki-dark-text-decoration);}html pre.shiki code .szBVR, html code.shiki .szBVR{--shiki-default:#D73A49;--shiki-dark:#F97583}html pre.shiki code .sZZnC, html code.shiki .sZZnC{--shiki-default:#032F62;--shiki-dark:#9ECBFF}html pre.shiki code .sScJk, html code.shiki .sScJk{--shiki-default:#6F42C1;--shiki-dark:#B392F0}
11월쯤 Spring boot 4버전이 나온다고 한다. 업데이트 내용을 보니 JSpecify 관련 내용이 있었다.
기존에 spring framework, lombok등 null 관련 annotation 이 산재되어 있었는데 JSpecify를 표준으로 삼으려는 것 같다.JSpecify와 NullAway를 조합하면 null safety 검증을 구축할 수 있다. 이번 글에서는 두 도구의 개념과 실제 적용 방법에 대해 알아본다.✅ 환경
java 21
Spring boot4-M1
✅ 잠깐 살펴본 Spring boot 4
spring-boot-3
spring-boot-4
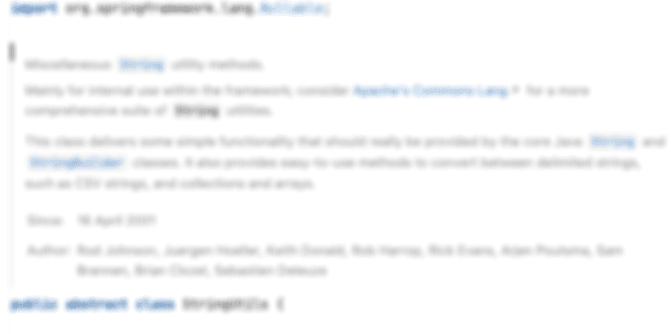
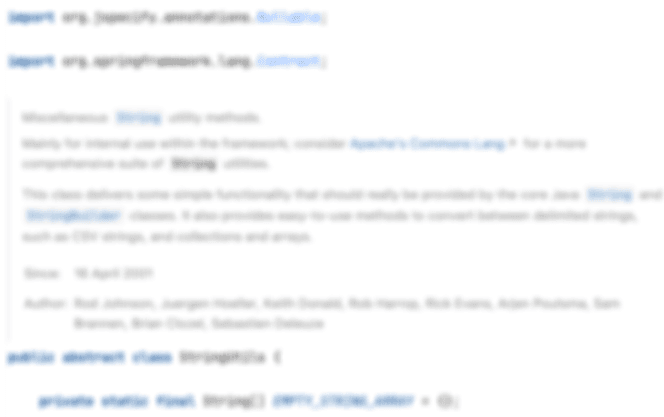
기존 springframework 어노테이션에서 JSpecify 로 변경된 모습이다.
✅ JSpecify 주요 어노테이션JSpecify는 Java 코드에서 null safety를 표현하기 위한 표준화된 어노테이션 라이브러리다.핵심 어노테이션들
@Nullable: null이 될 수 있는 값임을 명시
@NonNull: null이 될 수 없는 값임을 명시 (보통 기본값)
@NullMarked: 클래스나 패키지 단위로 null safety 규칙 적용
@NullUnmarked: null safety 검사에서 제외
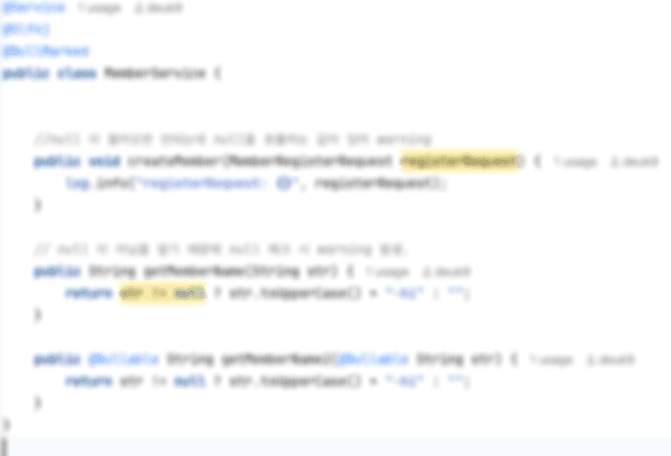
@NullMarked 적용@NullMarked // 이 어노테이션 하나로 클래스 전체에 null safety 적용
public class MemberService {
// 모든 매개변수와 반환값이 기본적으로 @NonNull
public String process(String input) {
return input.toUpperCase(); // input은 null이 될 수 없음이 보장
}
// 명시적으로 @Nullable을 선언해야 null 허용
public String processNullable(@Nullable String input) {
return input != null ? input.toUpperCase() : "";
}
}
✅ Gradle 설정build.gradle.kts 예시kotlinimport net.ltgt.gradle.errorprone.CheckSeverity
import net.ltgt.gradle.errorprone.errorprone
plugins {
java
id("org.springframework.boot") version "4.0.0-M1" id("io.spring.dependency-management") version "1.1.7" id("net.ltgt.errorprone") version "4.2.0"}
group = "org.example"version = "0.0.1-SNAPSHOT"java {
toolchain {
languageVersion = JavaLanguageVersion.of(21)
}
}
configurations {
compileOnly {
extendsFrom(configurations.annotationProcessor.get())
}
}
repositories {
mavenCentral()
// Spring 마일스톤 버전을 위한 리포지토리
maven { url = uri("https://repo.spring.io/milestone") }
}
dependencies {
implementation("org.springframework.boot:spring-boot-starter-web")
compileOnly("org.projectlombok:lombok")
annotationProcessor("org.projectlombok:lombok")
testImplementation("org.springframework.boot:spring-boot-starter-test")
testRuntimeOnly("org.junit.platform:junit-platform-launcher")
errorprone("com.uber.nullaway:nullaway:0.12.7")
errorprone("com.google.errorprone:error_prone_core:2.38.0")
}
tasks.withType<Test> {
useJUnitPlatform()
}
tasks.withType<JavaCompile>().configureEach {
options.errorprone {
disableAllChecks.set(true)
check("NullAway", CheckSeverity.ERROR)
option("NullAway:AnnotatedPackages", "org.example")
}
}
✅ IDE 도움 받기
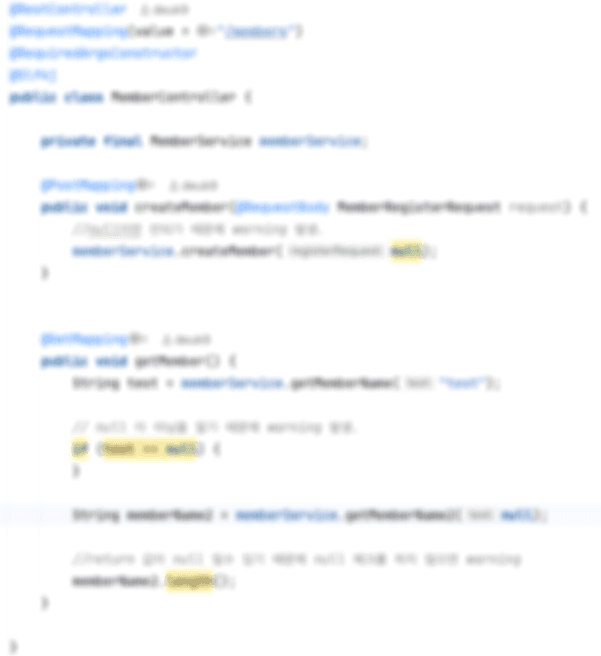
controller
service
✅ 빌드 시sample/src/main/java/org/example/nullablesample/member/MemberController.java:22: error: [NullAway] passing @Nullable parameter 'null' where @NonNull is required
memberService.createMember(null);
^
(see http://t.uber.com/nullaway )
빌드 시 애러 발생.
✅ 정리
Kotlin으로의 전환이 어렵거나 점진적으로 진행해야 하는 레거시 자바 프로젝트에서, JSpecify와 NullAway는 괜찮은 대안이다.
이 생태계를 사용하지 않는 외부 클라이언트로부터의 호출을 막을 수는 없습니다. 따라서 라이브러리나 외부에 노출되는 Public API 경계에서는, 여전히 Objects.requireNonNull() 등을 사용한 명시적인 런타임 Null 체크를 통해 방어적으로 코드를 작성해야 한다.